Build the curve cage of co-planar with the vertices snapped to each other respective end. * Expiriment outside of this exercise with different types of curves for more detail and shaping of panels Build the shirt cage. Note the shirt was built symmetrically so mirroring was a fast process. Build the collar portion. Here both are placed together in the scene. To create panels for the proceeding the garment, we select a nSided cage and select [Create Panel] When starting the seaming process, begin by choose a start panel and select [Create Garment] Then Seam the panels to one another, creating a seamless mesh * Note: By switching the Surfaces Pick Mask to the off position, selection issues are alleviated. Complete the seaming of the collar first... Attach to the shirt neck regions. * Note: If you get twisted seams, backup and re-examine your seam work flow. Here you can see a partial seaming. The completed garment. To build the sleeve fringes, enable History and select the cloth edges and execute the crvOnPoly.mel script. Select degree 3 and a curve with history relations to the cloth edges is created. Built a profile spline, translate this to the initial curve point and Extrude with the settings shown. The completed garment with sleeve and edge fringes. The final garment shielding "Jackie" from the elements... is motion tested for a look at the deformation Lower resolution version with history driven fringes Rendering of Cloth garment with cloth shader in RGB|BMP channels. * Note: For Solver, Properties or other Cloth issues, refer to the Maya|Cloth Documentation.
Scene File available at n8Dog.com
|
Sunday, January 20, 2013
Maya Collared Cloth Shirts by Nathaniel Adam Briggs
** AUTHORED IN 1999-2000 **
Maya SoftBody Surface Particles by Nathaniel Adam Briggs
** AUTHORED IN 1999-2000 **
| The following concept tutorial will be covering Surface Emitted Particles on SoftBody tenticles to create a spiraling array particle system for futuristic gun blasts or whatever. Anatomy of Concept: A central control object drives the vector and twist of the softbody goals. Particles are emitted from the surface of the softbody objects. Steps for Creation: Create | Orient | Parent: 1 poly cube, slightly flattened (scale.y). 1 nurb cylinder with 20+ spans & scale.y to elongate it. 1 locator positioned at the top of the cylinder. Parent the locator to the cylinder. Duplicate the loc|cyl so one meets each face of the cube. SoftBody | Springs: Make each cylinder a softBody. Duplicate, Make Copy Soft | Hide Non-Soft Object | Make Non-Soft a Goal Select the particles of the new softBody and create Springs Hide the Springs. GoalPP Weights: RMB select 75% of the particles starting from the bottom. Using the Component Editor, Particles | goalPP , change the column to 0.000 Quick Test: Keyframe the control poly cube rot.y over 50 frames and play the timeslider (free playback speed). Your softBody particles should be deforming according to the rotation. Particle Emission: Select the SoftBody cylinder and then Particles | Emit from Object. Emitter Type SURFACE and use 500 or so. Adjust Particle Emission: Edit the particleShape node with the following adjustments. .85 Conserve LifeSpan Mode | Random Range | .85 | .35* PLAY TIME - EXPIRIMENT HEAVILY!!! Finishing Up: Keyframe a rotation of the control box (rot.y) and translation (trans.y) among 100 keyframes or so A Gravity and Radial field to pull down and push out from the central axis on the particles. Hardware renderable MultiStreak | 7.4 Tail Size was used with a gradient in rgbPP Final Comp | Closing: Toy around with different settings, fields, particles etc. Below is a post use of the particles. HAVE FUN AND EXPIRIMENT!!
Scene file available at n8Dog.com
|
Maya Dynamic Constraints "Star Wars Pods" by Nathaniel Adam Briggs
** AUTHORED IN 1999-2000 **
Anatomy of Concept:
Nulls drive the translation of the spring constraints.
Spring(s) contraint drives geometry movement.

Steps for Creation:
Geometry Construction:
2 cylinders, 1 translated +3 X, 1 translated -3 X
1 cube, tweak as needed, position it along the Z & Y. (see below)

Rigging:
Draw joints and create an IK Rotate Plane Solution for each (see below).

Parent each respective Ik Handle to "its" Cylinder. (see below)

Parent each respective start joint to the "sled" geometry.
Create a null and make it the parent of the "sled" geometry. (see below)

Spring Constraints:
Create 2 spring contraints for the cube (sled) geometry
Translate 1 spring constraint -4 X and the other +4 X.

More Spring Constraints:
Create 2 spring constraints per cylinder and translate one +4Y and one -4Y (for each).
Create a null for both the upper constraints and a null for the lower constraints.
Position the nulls according to the Y axis of their respective spring constraints.
Free translations on the nulls.
Make the corresponding null the parent of the corresponding constraints (upper or lower) (See below)

Added Control:
For additional control, add more constraints per your needs. (see below)

Animate:
Animate the Null Controllers and playback the scene.
Adjust your springs and see how they enhance your scene.
Forward Springs

Rear Springs

This is a rough quick idea to get you started in the land of dynamic constraints!
* PLAY TIME - EXPIRIMENT HEAVILY!!!
Full Tutorial with Scene Files available at n8Dog.com
Got complaints? Please email it to yourself.
Anatomy of Concept:
Nulls drive the translation of the spring constraints.
Spring(s) contraint drives geometry movement.
Steps for Creation:
Geometry Construction:
2 cylinders, 1 translated +3 X, 1 translated -3 X
1 cube, tweak as needed, position it along the Z & Y. (see below)
Rigging:
Draw joints and create an IK Rotate Plane Solution for each (see below).
Parent each respective Ik Handle to "its" Cylinder. (see below)
Parent each respective start joint to the "sled" geometry.
Create a null and make it the parent of the "sled" geometry. (see below)
Spring Constraints:
Create 2 spring contraints for the cube (sled) geometry
Translate 1 spring constraint -4 X and the other +4 X.
More Spring Constraints:
Create 2 spring constraints per cylinder and translate one +4Y and one -4Y (for each).
Create a null for both the upper constraints and a null for the lower constraints.
Position the nulls according to the Y axis of their respective spring constraints.
Free translations on the nulls.
Make the corresponding null the parent of the corresponding constraints (upper or lower) (See below)
Added Control:
For additional control, add more constraints per your needs. (see below)
Animate:
Animate the Null Controllers and playback the scene.
Adjust your springs and see how they enhance your scene.
Forward Springs
Rear Springs
This is a rough quick idea to get you started in the land of dynamic constraints!
* PLAY TIME - EXPIRIMENT HEAVILY!!!
Full Tutorial with Scene Files available at n8Dog.com
Got complaints? Please email it to yourself.
Thursday, January 17, 2013
USS IOWA Battleship by Nathaniel Adam Briggs
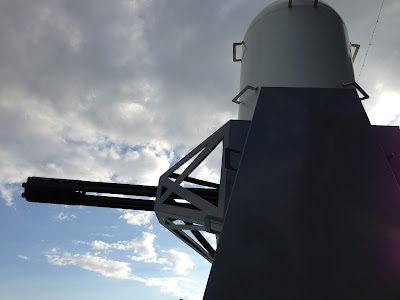
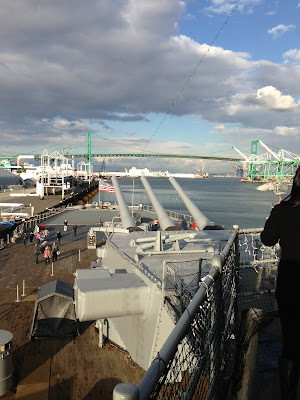
Why can't battleships be personal water craft? Oh yeah! OK, I know what you're thinking.. it's about the docking, and deck hand overhead. No? OK, perhaps the difficulty in finding a reason to justify skeet shooting with a Phalanx CIWS weapons systems.. and then there's having to pick up all those spent shells...
If you get a chance while in Los Angeles (San Pedro / Long Beach), definitely go check out the U.S.S. IOWA Battleship
https://www.linkedin.com/in/losangelescto / losangelescto
Nathaniel Adam Briggs
If you get a chance while in Los Angeles (San Pedro / Long Beach), definitely go check out the U.S.S. IOWA Battleship
 |
| Ideal for home defense... |
 |
| Wonder if it works better than AT&T Wireless.... |
 |
| The view as you run over other boats in front of you.... |
 |
| More home defense... could use this on my lawn |
 |
| Better than anal leakage I suppose... |
 |
| I have nothing witty to say here... |
 |
| That's what SHE said! |
 |
| Tequila! 3 Fingers. |
 |
| Something witty this way doesn't come... |
 |
| Kaboom |
 |
| Mo' Guns |
https://www.linkedin.com/in/losangelescto / losangelescto
Nathaniel Adam Briggs
Subscribe to:
Comments (Atom)
